Apple Silicon and Virtual Machines: Beating the 2 VM Limit
- macOS Internals Deep Dive
- Building a Development Kernel Collection
- Configuring our Mac to boot the Development Kernel Collection
- Putting our machine to work!
- When did Apple grace us with this feature?
- Undoing our work for OS updates
- Closing Thoughts
For those who’ve been wondering what I’ve been doing for these past few months outside of OpenCore Legacy Patcher, I got the amazing opportunity to work as a Mac Admin Intern at a local consultant company.
One of the areas I’ve been working quite a bit with is macOS Virtual Machines, specifically Apple Silicon Virtual Machines based on Apple’s Virtualization framework. However, not long after doing a lot of development and testing using Apple’s VM stack (through the amazing project, UTM), I found a very frustrating limitation: Apple Silicon hosts can only have a maximum of 2 macOS guest VMs active at once.
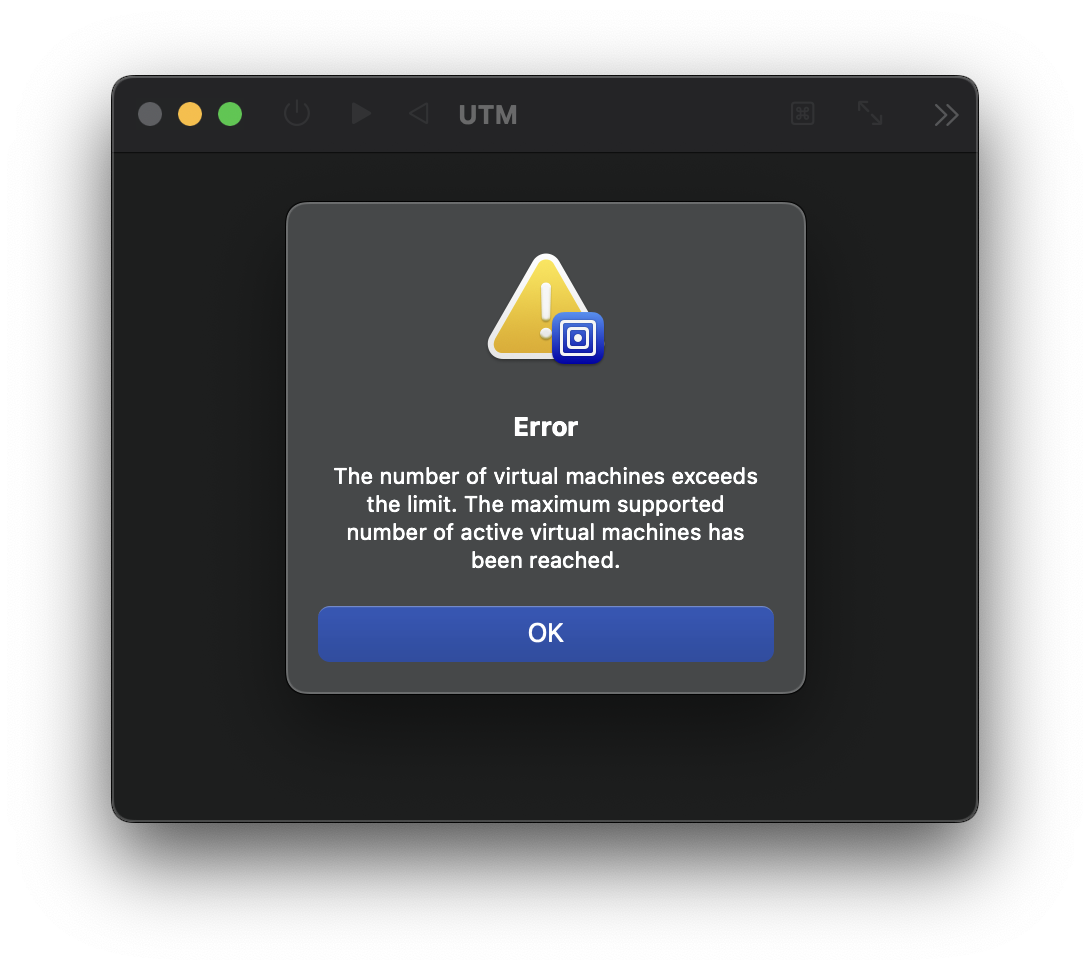
This is most commonly seen with this error, generated by Virtualization.framework:
The number of virtual machines exceeds the limit. The maximum supported number of active virtual machines has been reached.
The main reason for this error comes from macOS’ SLA, section 2.B.iii:
(iii) to install, use and run up to two (2) additional copies or instances of the Apple Software, or any prior macOS or OS X operating system software or subsequent release of the Apple Software, within virtual operating system environments on each Apple-branded computer you own or control that is already running the Apple Software, for purposes of: (a) software development; (b) testing during software development; (c) using macOS Server; or (d) personal, non-commercial use.
While I cannot officially virtualize more than 2 copies of macOS on a single machine at once for work, I was still interested in figuring out where in macOS Apple embeds these checks and whether hobbyists and researchers could enable support for more than 2 active macOS VMs at once.
macOS Internals Deep Dive
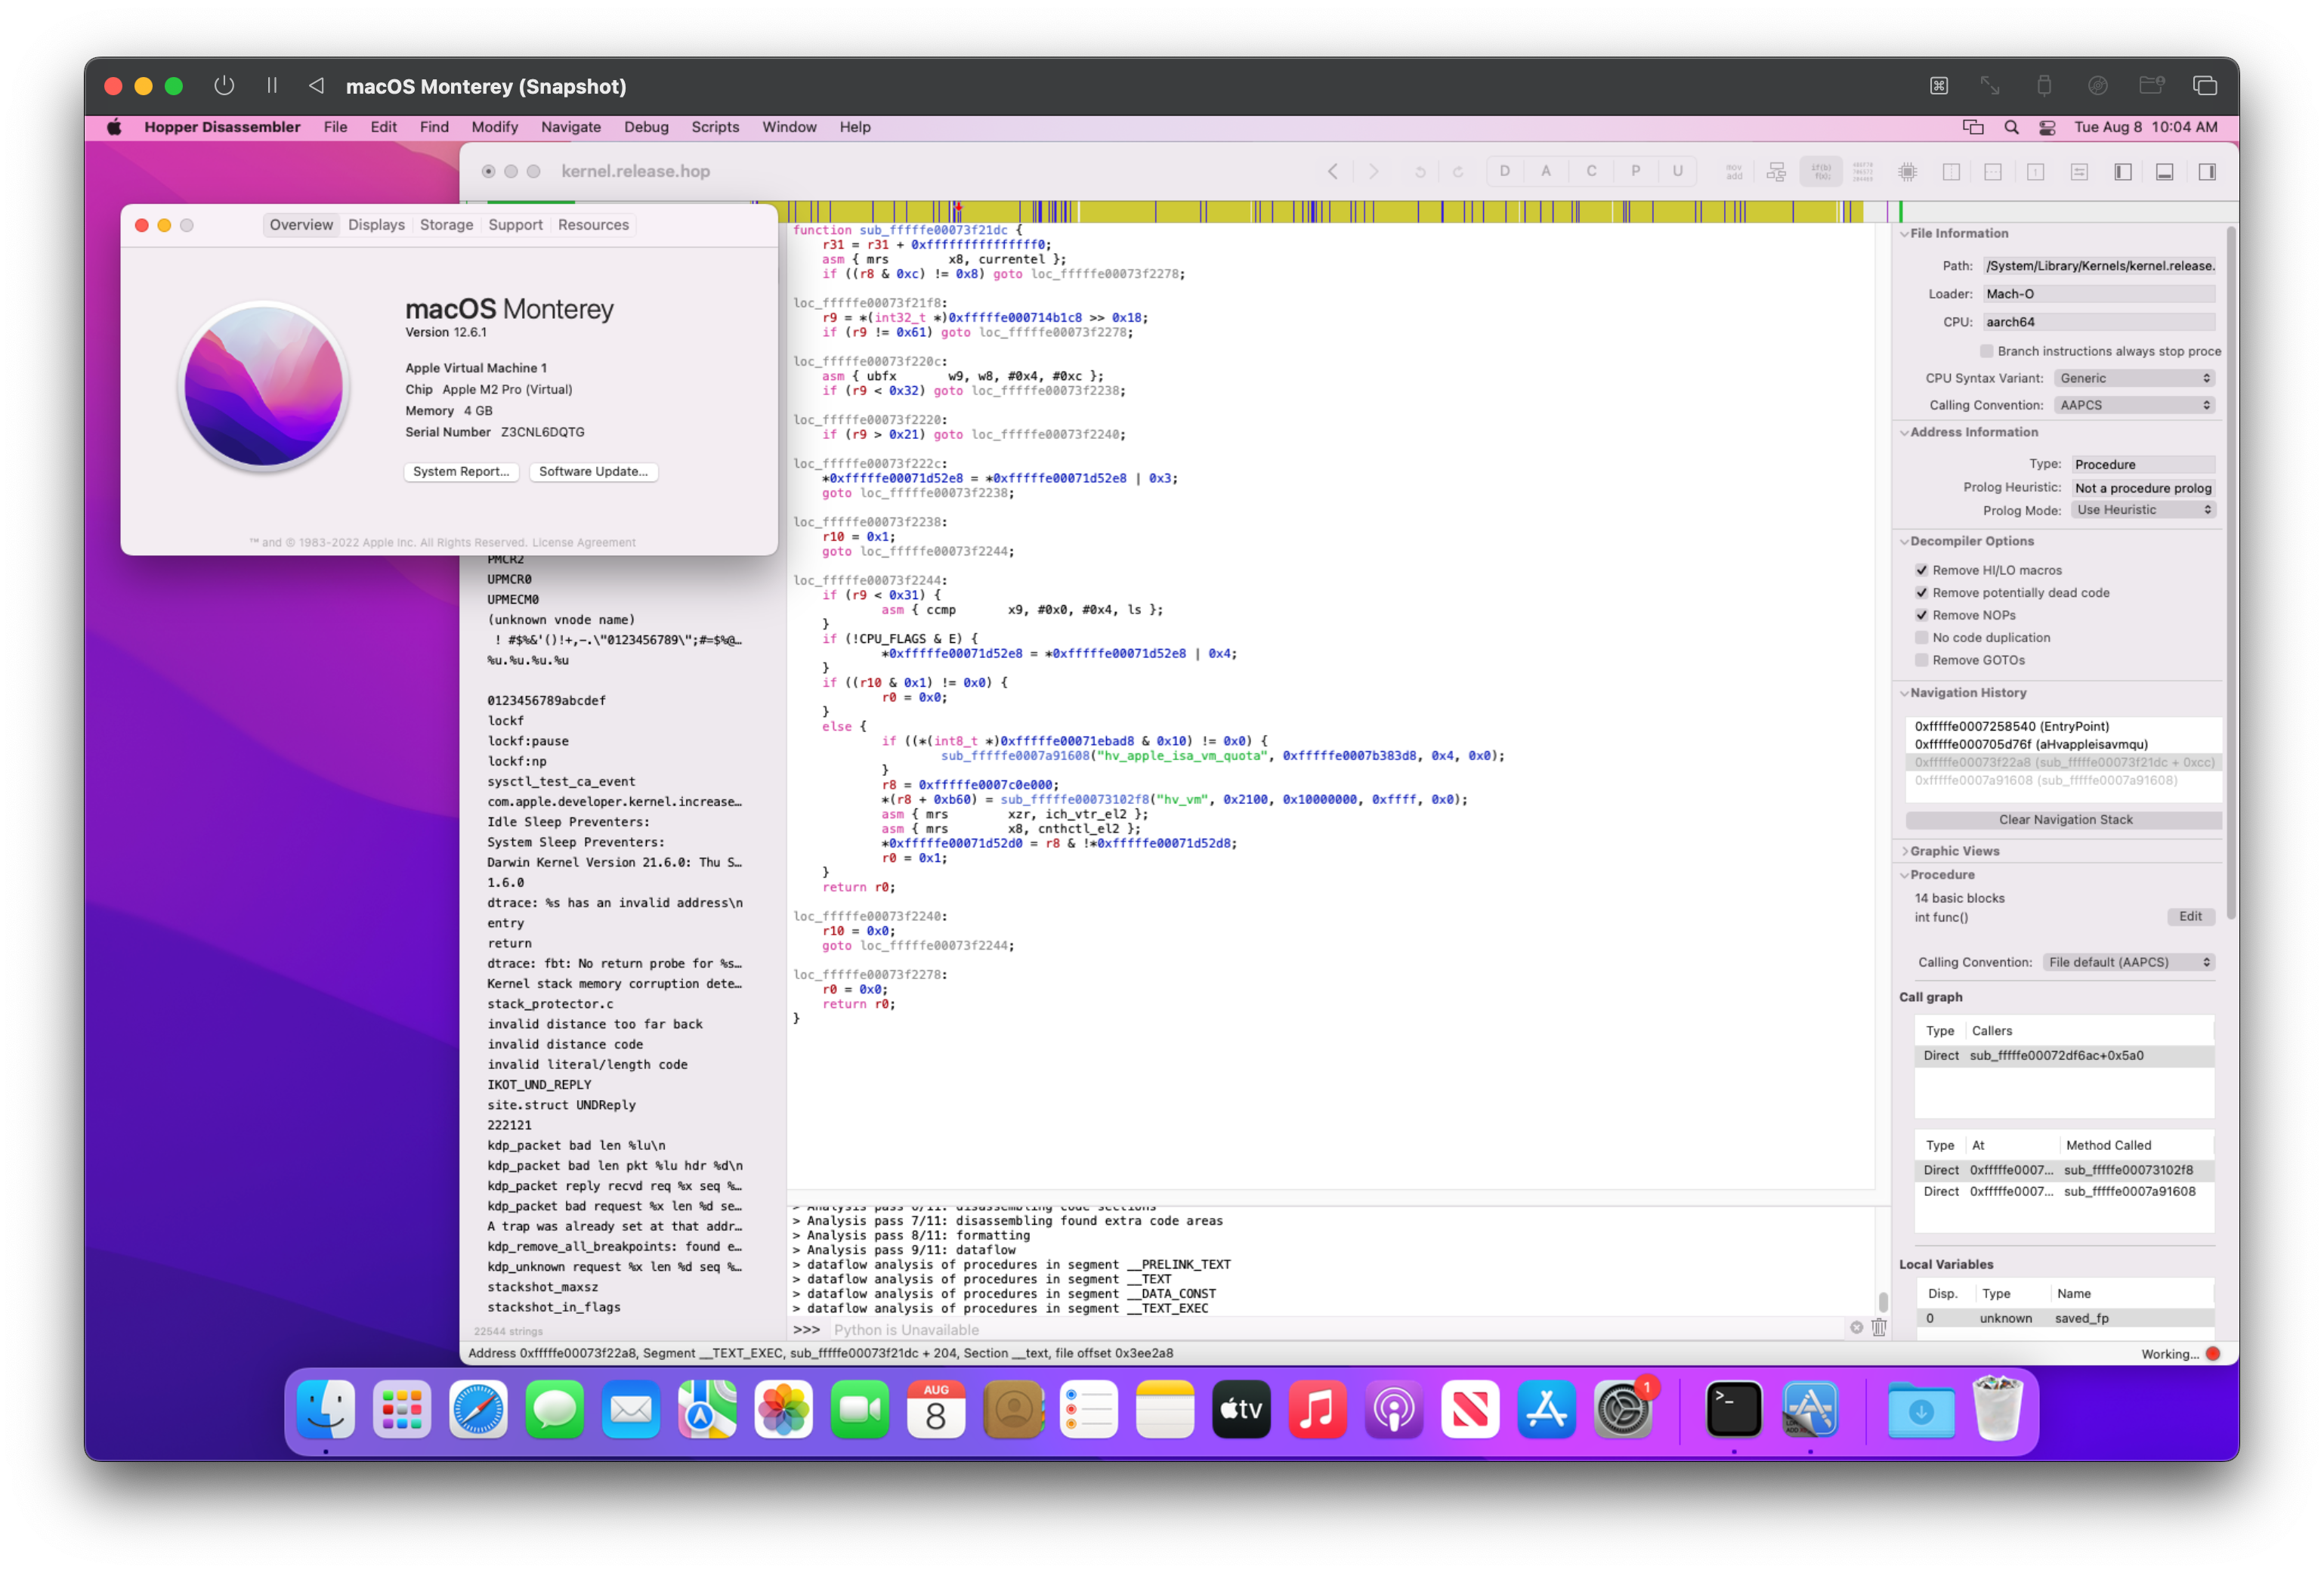
To start, I initially thought this limitation was userspace based and as such would be embedded somewhere within /System/Library/Frameworks/Virtualization.framework. Due to macOS Big Sur’s dyld merger of frameworks, we’ll need to either extract the framework manually or use tooling such as Hopper Disassembler to load specific binaries embedded in the dyld shared cache.
- More information on macOS Frameworks and the dyld shared cache: Battle against on-disk binaries
With this, I was able to examine the framework more closely. However, after many hours of research, I was unable to find where Apple imposed the VM limit. At best, I could only determine that the error message was generated from the framework but nowhere in userspace itself does Apple define a hardcoded 2 VM limit…
After a tip from jevinskie on the Hack Different Discord server, I learned that Apple’s guest limitation is implemented somewhere within the closed-source part of XNU (the macOS kernel). While I didn’t have any strings to go off of, I did know that the Intel Kernel won’t have the same code. So with a not-so-quick comparison between the functions and strings of the Intel and Apple Silicon kernels, I found that the main VM stack is under hv_vm_*.
Throwing the development kernel for macOS Sonoma Beta 4 (23A5301h) in IDA, I found the init code for the VM stack: hv_init():
- To get a development kernel, you’ll need to download your OS’ Kernel Debug Kit off the developer portal
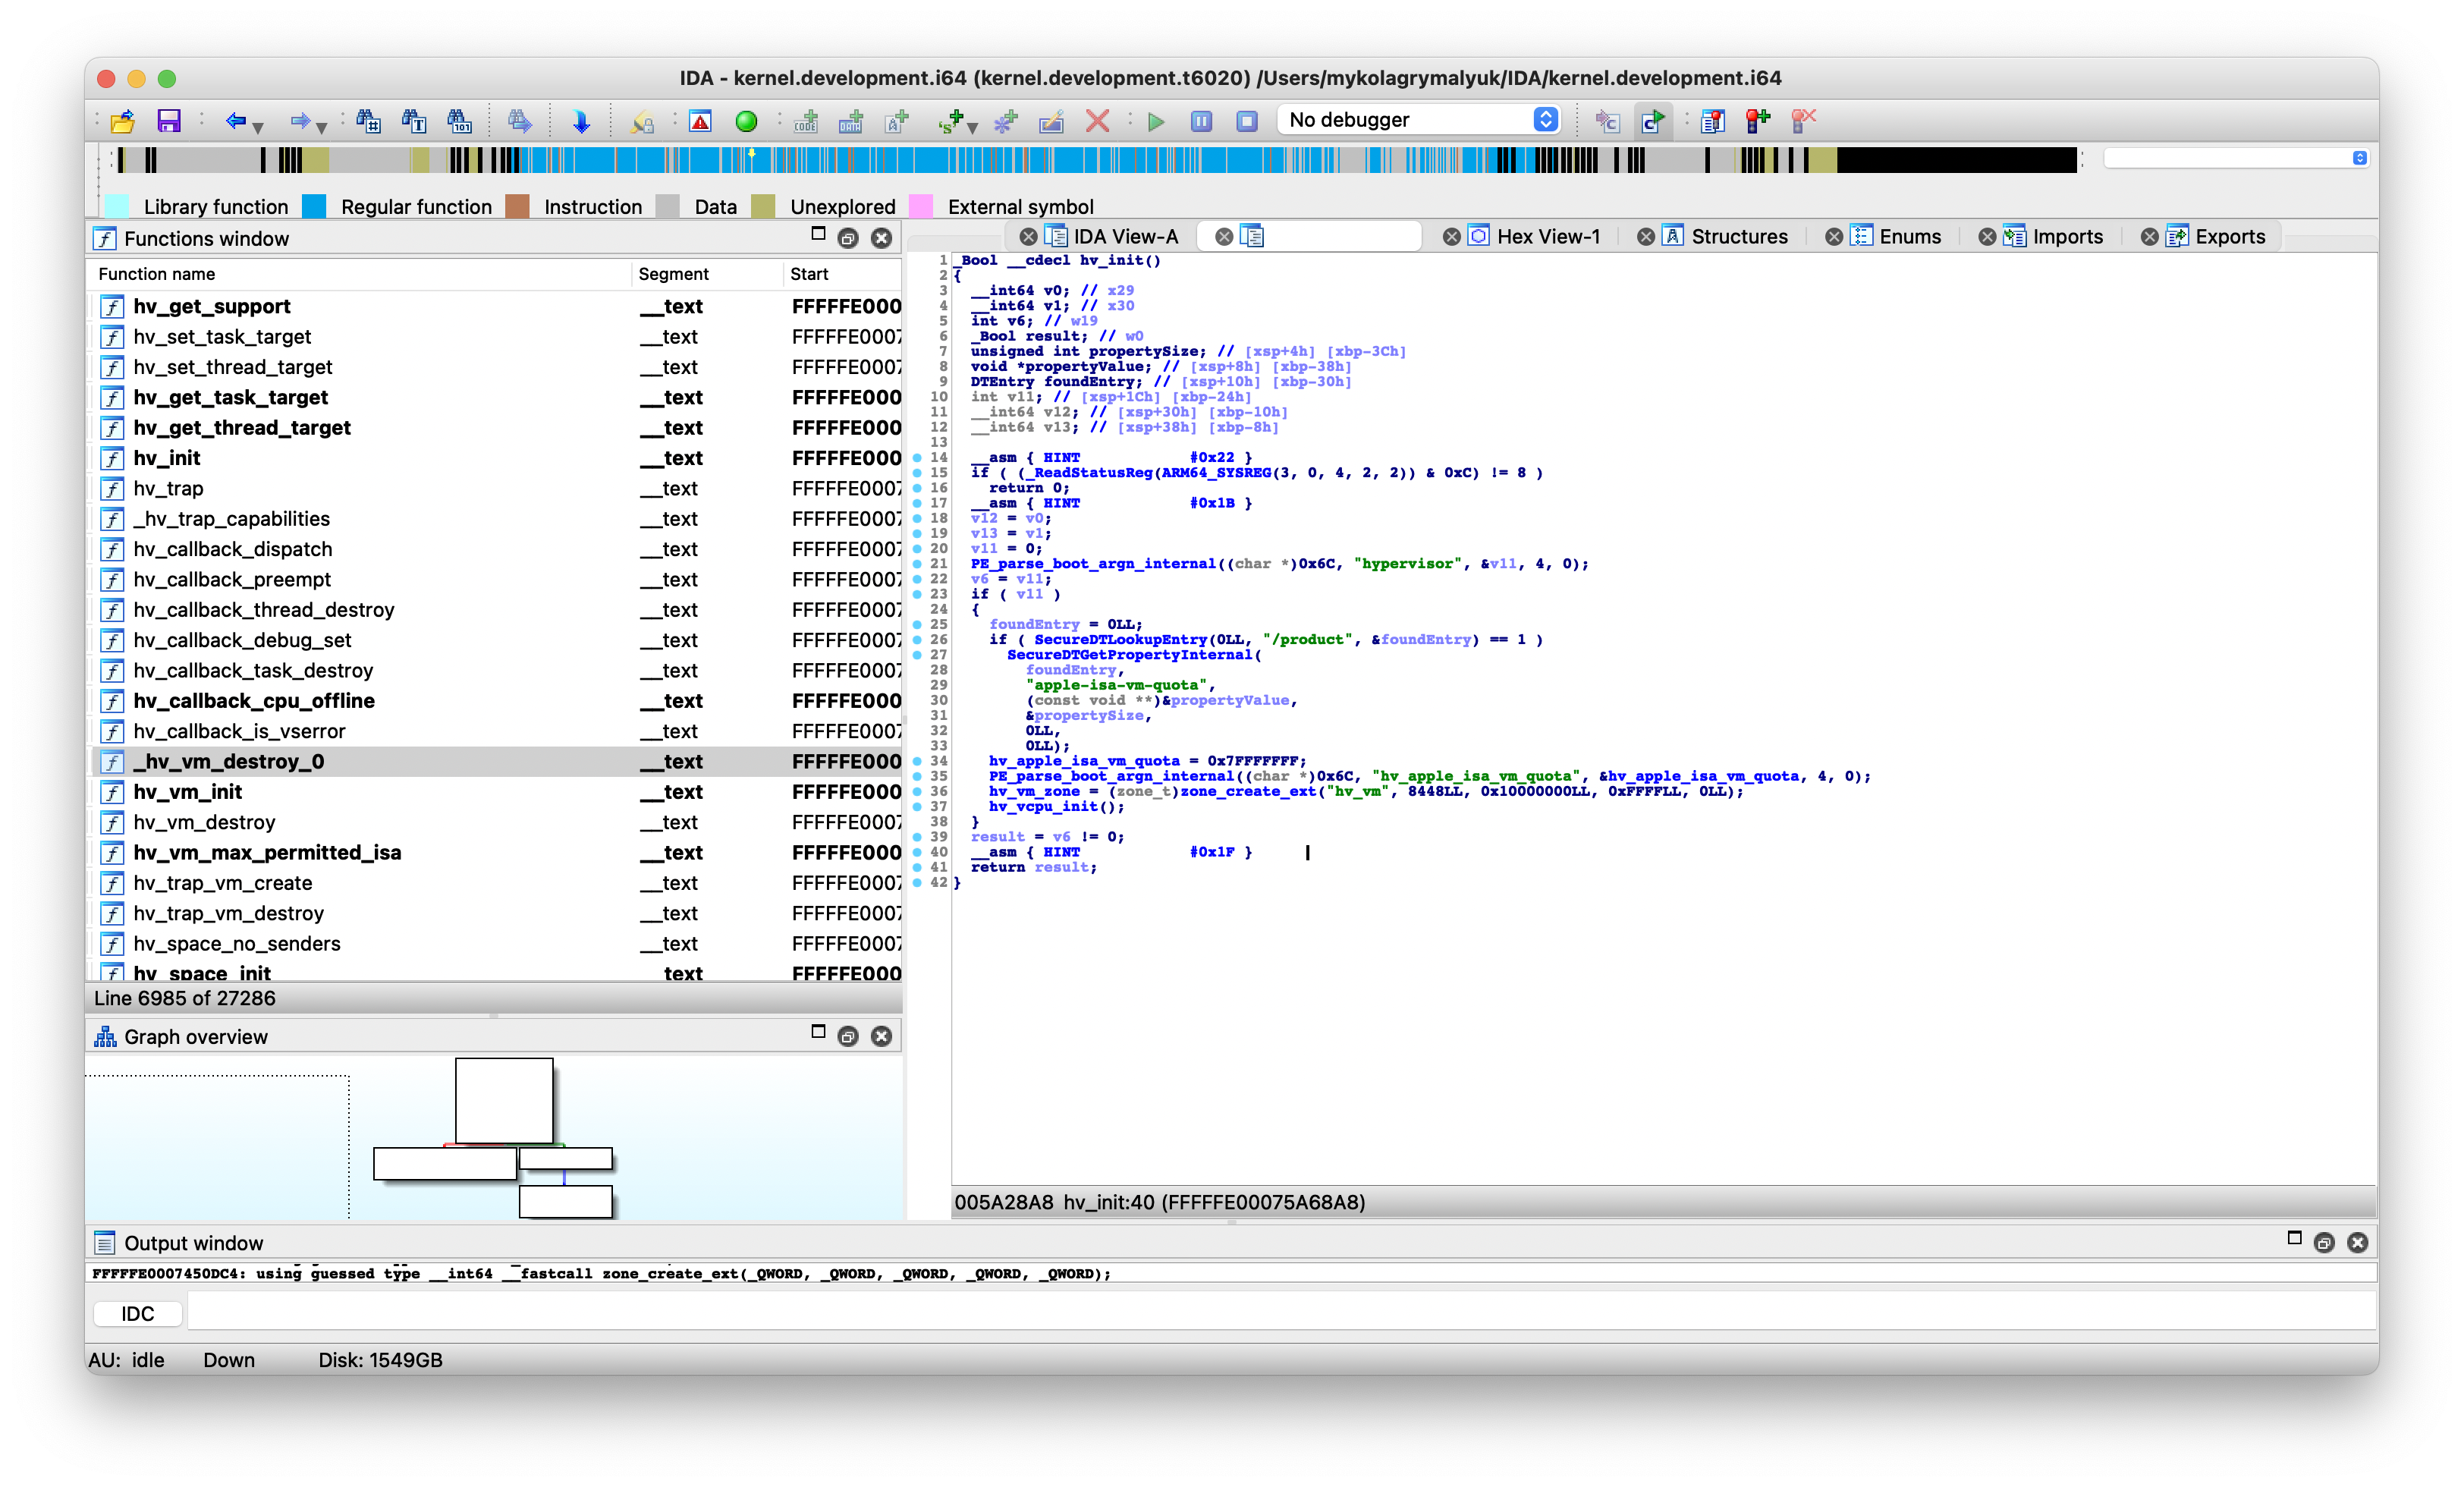
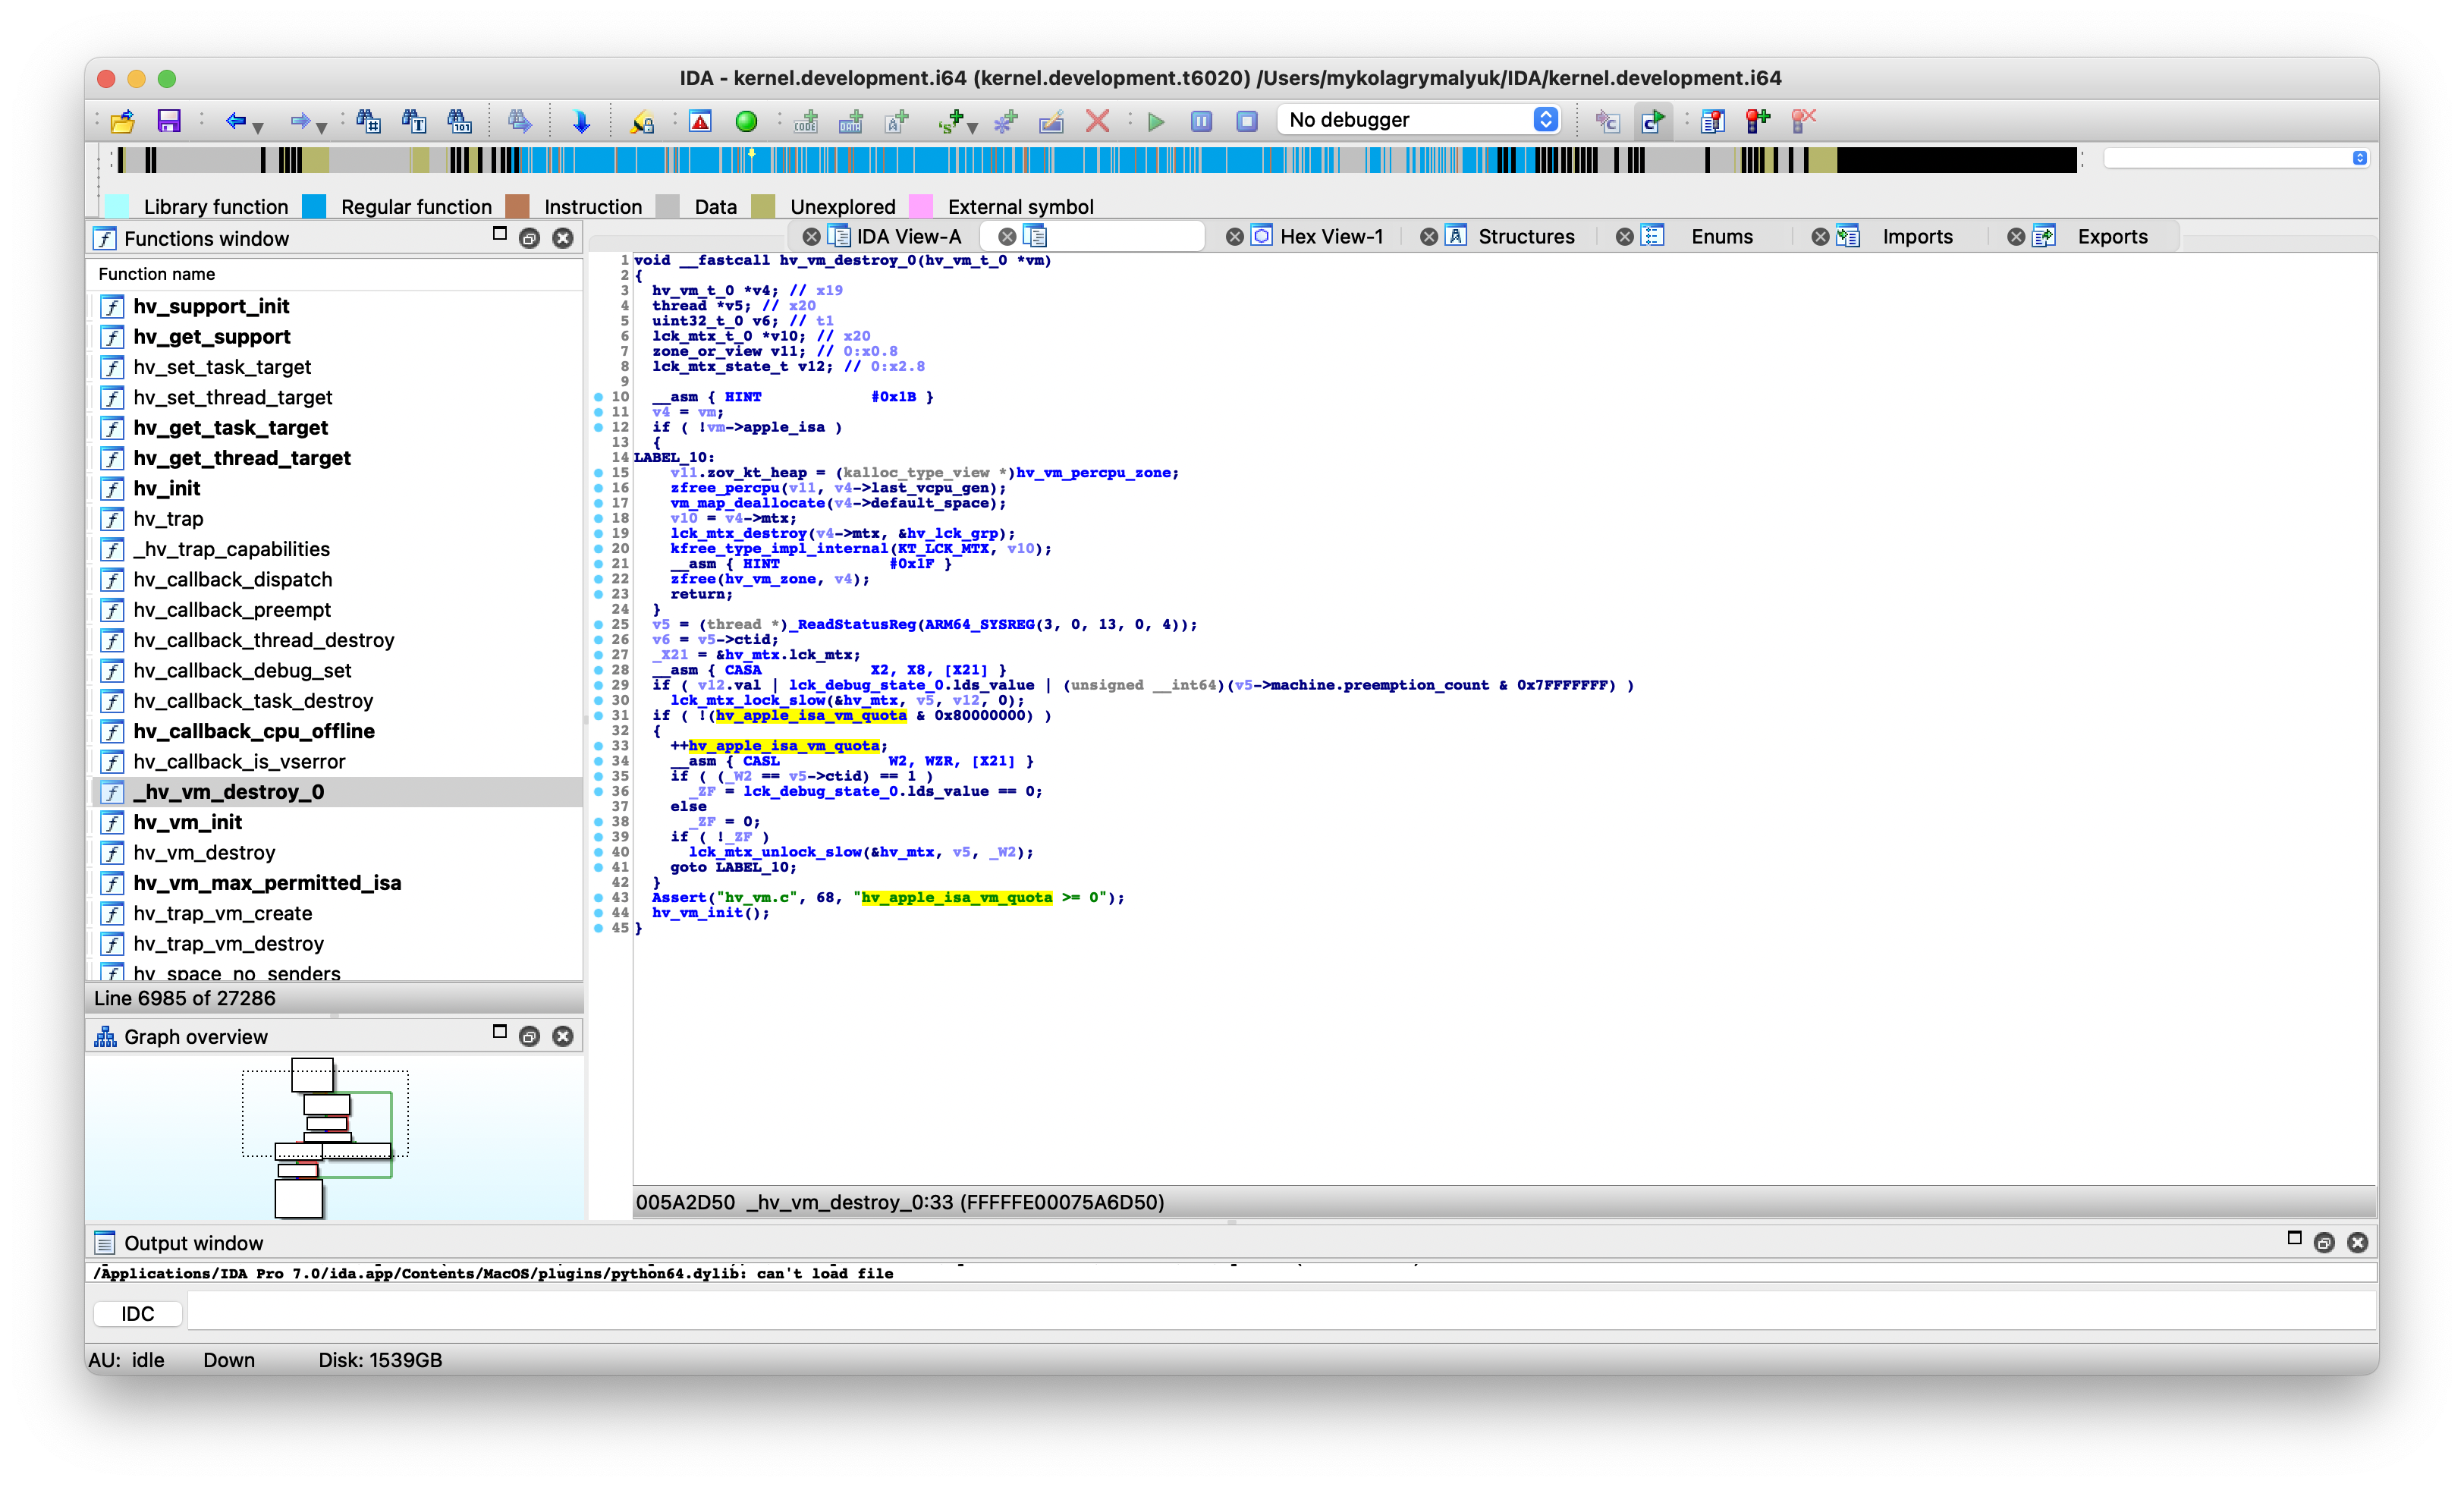
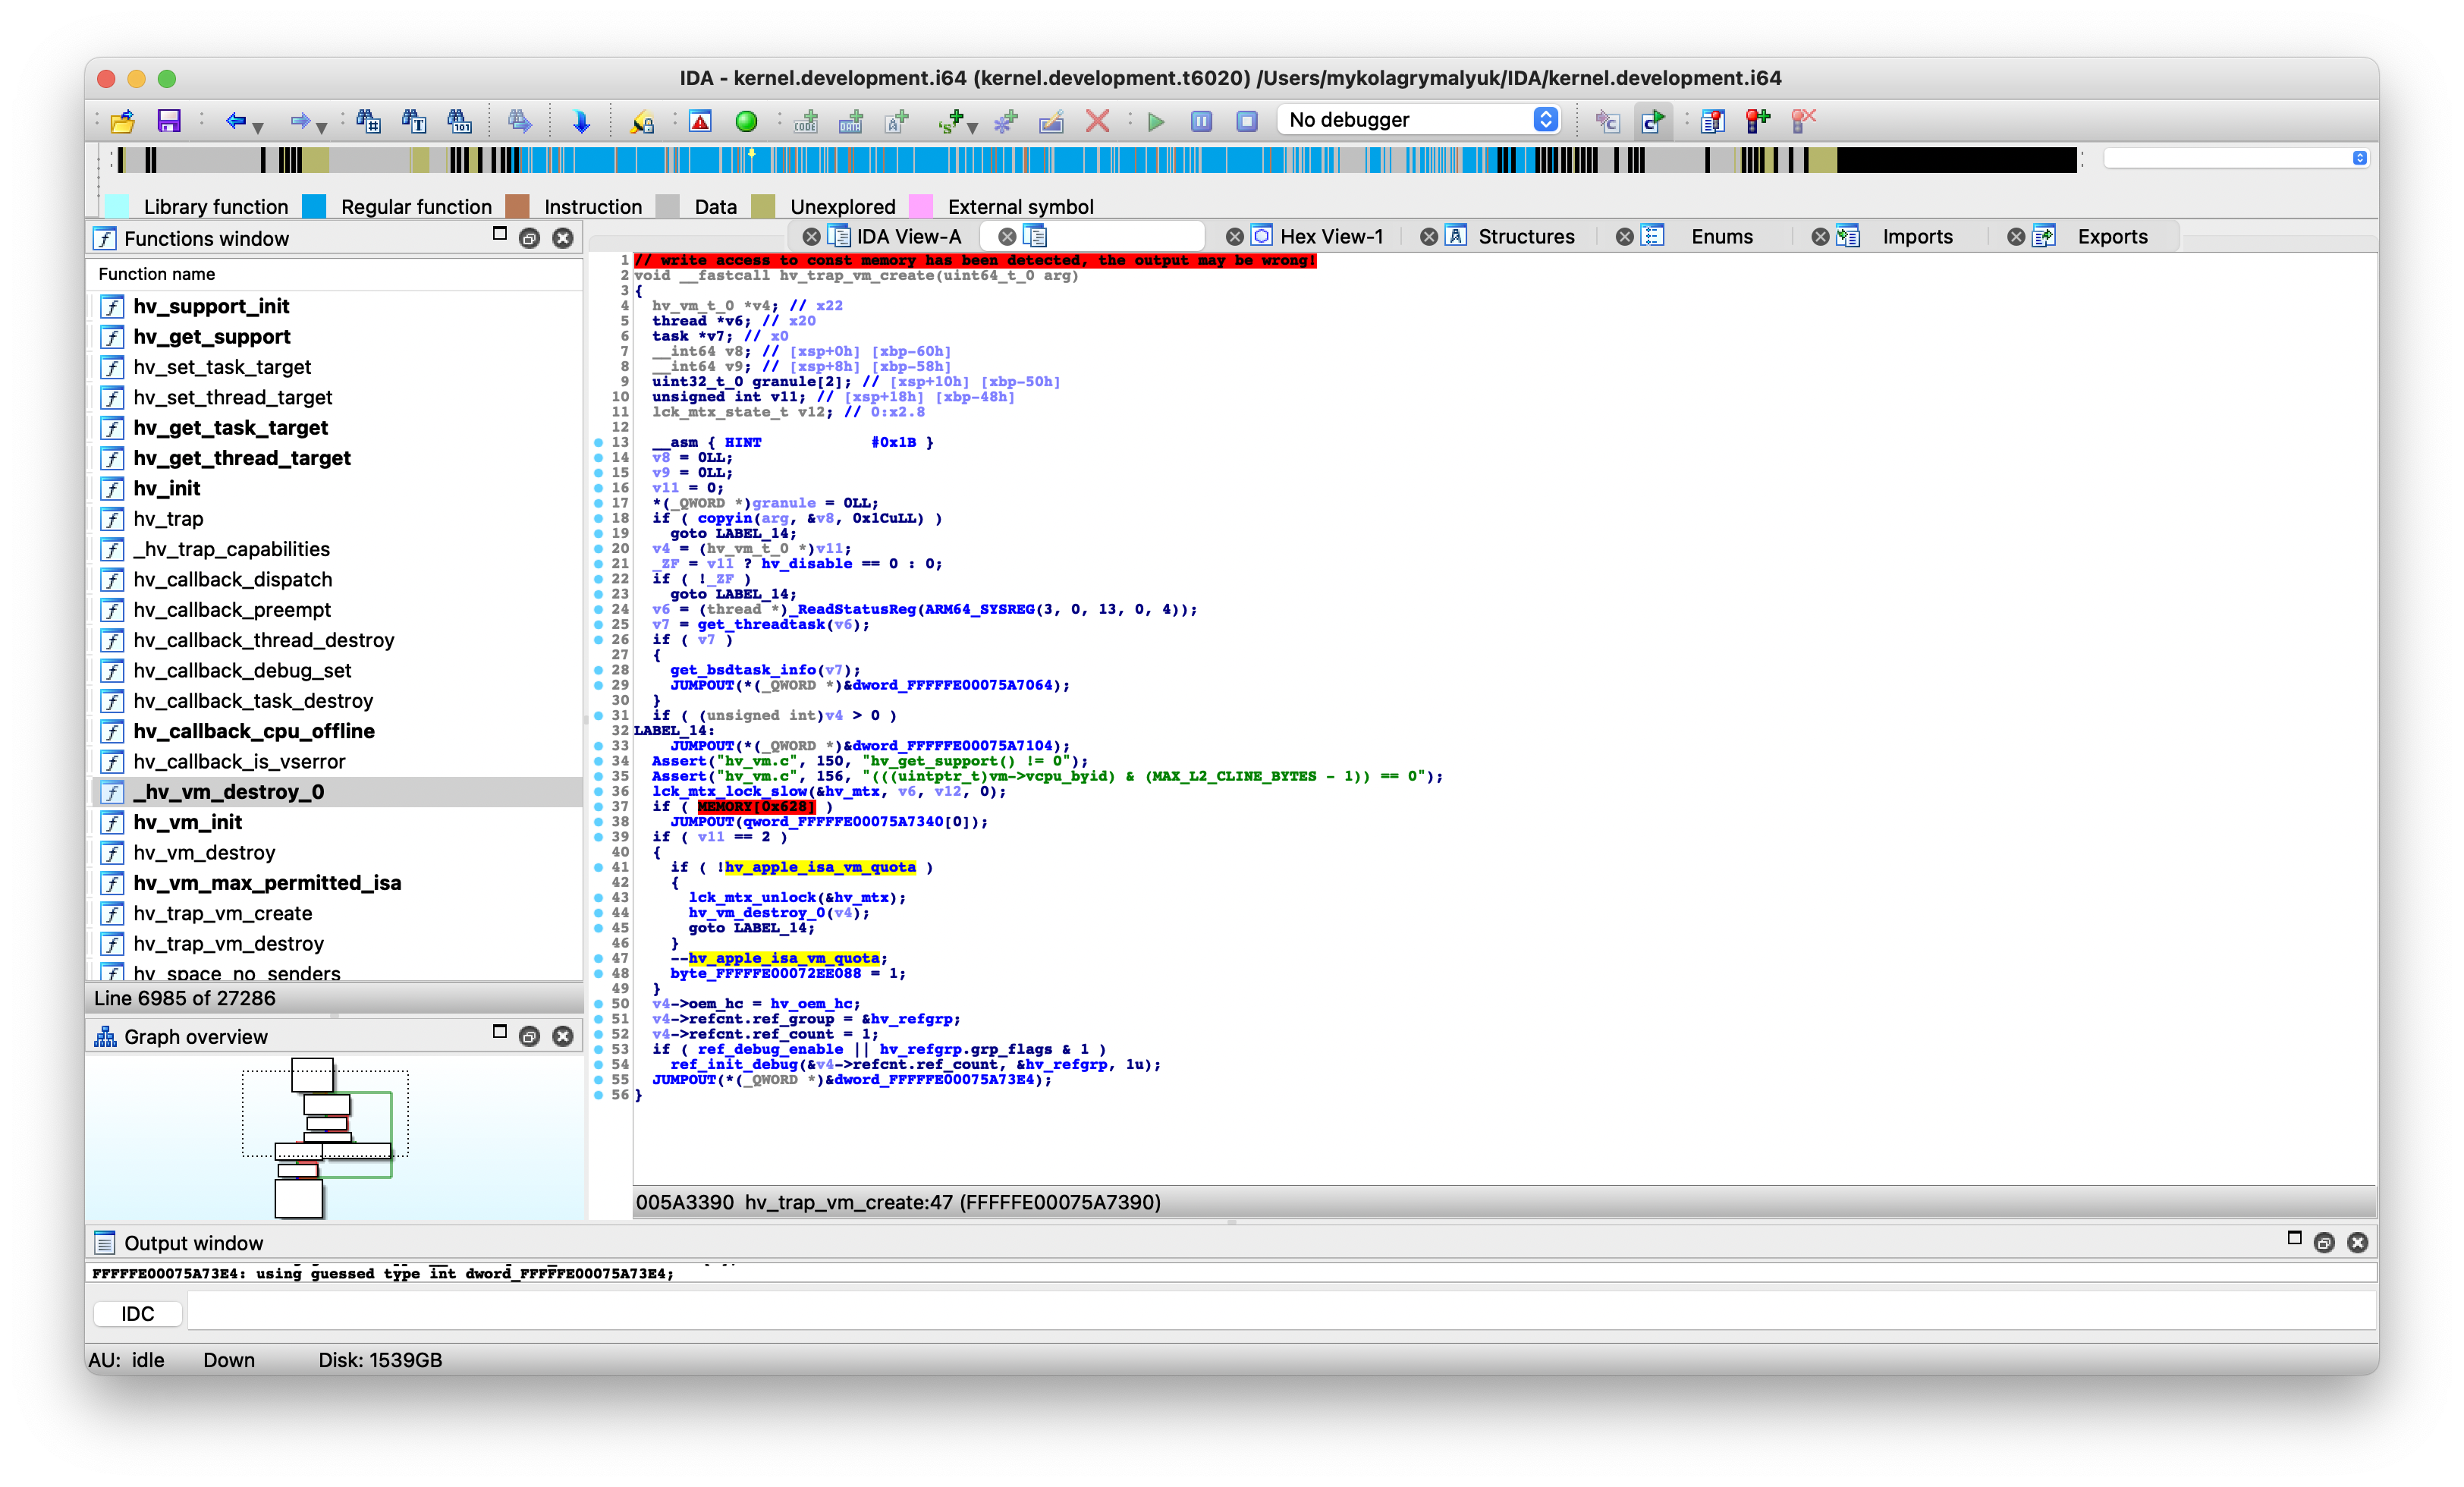
Here we see how Apple handles the VM limitation: Using the int hv_apple_isa_vm_quota variable, the kernel decrements/increments the variable as new Virtual Machines as started/stopped:
| Increment Function | Decrement Function |
|---|---|
void hv_vm_destroy_0(hv_vm_t_0 *vm) |
void hv_trap_vm_create(uint64_t_0 arg) |
 |
 |
And something else is interesting, 2 new boot-args: hypervisor= and hv_apple_isa_vm_quota=.
The former is a simple gate check for the latter, which is far more interesting: hv_apple_isa_vm_quota= can override the VM limitation in the kernel!
However, after some more research, I found that this logic is not the same in the release kernels. Instead, Apple swapped the hypervisor boot-arg with an AppleInternal check through System Integrity Protection:
- For a bit more info on SIP, I wrote about that here: System Integrity Protection: The misunderstood setting
/*
  CSR_ALLOW_APPLE_INTERNAL = 0x10

  From XNU Source:
  #define CSR_ALLOW_APPLE_INTERNAL (1 << 4)
  https://opensource.apple.com/source/xnu/xnu-7195.121.3/bsd/sys/csr.h.auto.html
*/
if ((*(int8_t *)_csr_config & 0x10) != 0x0) {
  _PE_parse_boot_argn_internal(*0xfffffe00072696d0 + 0x6c, "hv_apple_isa_vm_quota", 0xfffffe0007b58410, 0x4, 0x0);
}
Here we have 2 options:
- Boot Apple’s Development Kernel
- Modify the release kernel to strip the
AppleInternalcheck
To save the bit of sanity I have left, we’ll go with the first option. So now my next challenge: Booting a development kernel on my MacBook Pro.
Building a Development Kernel Collection
To build a development kernel collection, we’ll need to fetch the appropriate Kernel Debug Kit from Apple’s Developer Site. Note that KDKs must match the host, otherwise, issues can occur both during kernel and kext linkage as well as during boot.
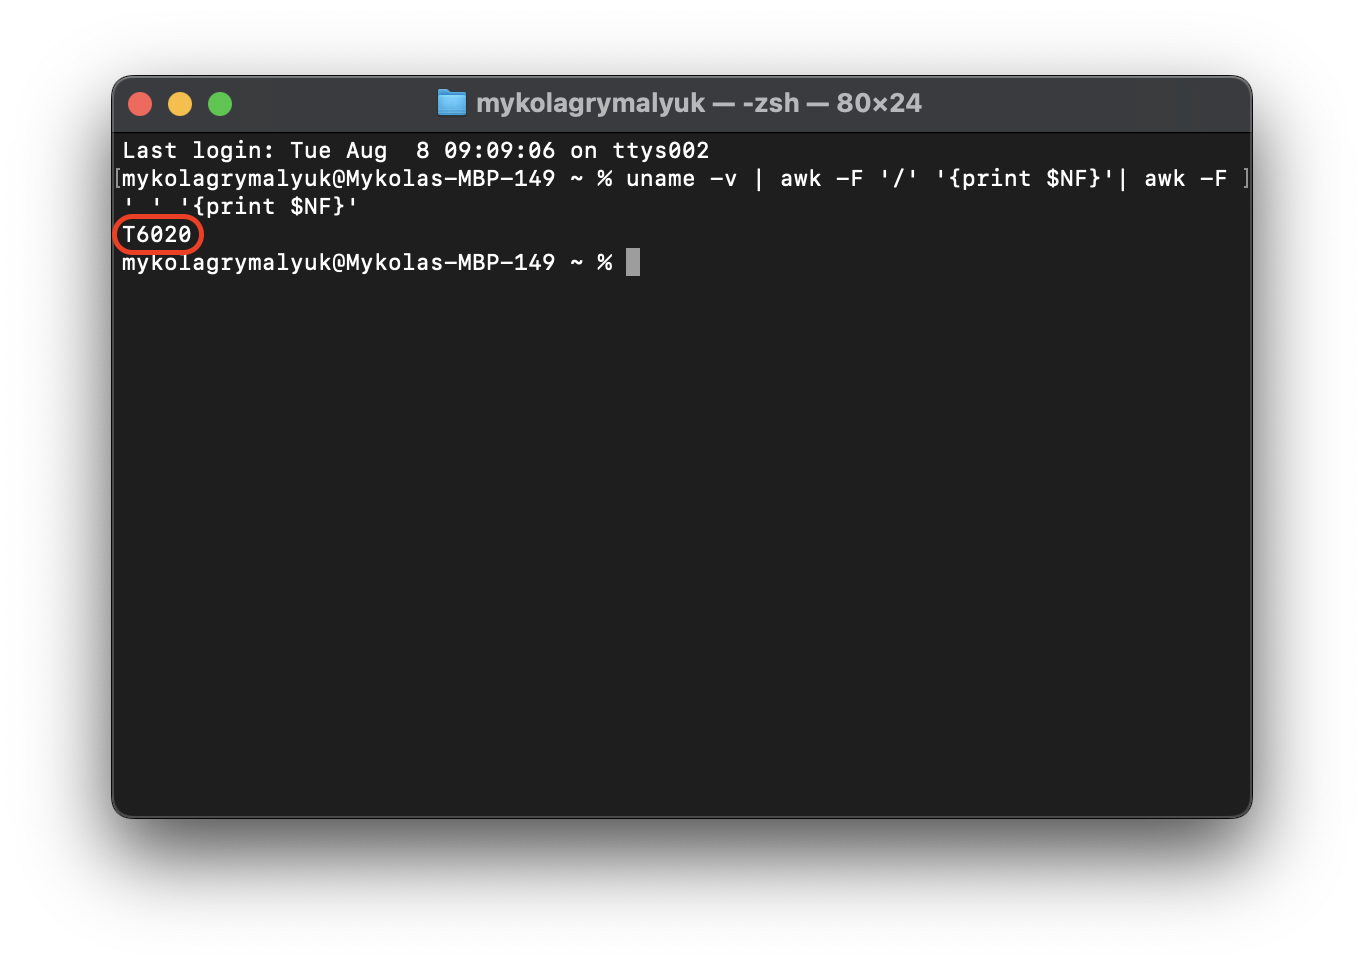
Once you have the KDK Disk Image downloaded and installed the embedded package, next check the type of kernel your Mac uses:
uname -v | awk -F '/' '{print $NF}'| awk -F '_' '{print $NF}'
On an M2 Pro MacBook Pro (Mac14,9), this will return T6020. On other CPU models, especially different generations such as M1 vs M2, the kernel variant will be different:
Now we can start building our kernel!
The following invocation assumes:
- Host machine uses a
T6020Kernel - Host is running macOS 14.0, Build 23A5301h
Ensure you adjust your invocation below to match your host respectively.
- Much appreciation to engineers at Apple, especially Jeremy C. Andrus for their blog post on booting custom kernels:
sudo kmutil create \
  --arch arm64e \
  --no-authorization \
  --variant-suffix development \
  --new boot \
  --boot-path VirtualMachine.kc \
  --kernel /Library/Developer/KDKs/KDK_14.0_23A5301h.kdk/System/Library/Kernels/kernel.development.t6020 \
  --repository /Library/Developer/KDKs/KDK_14.0_23A5301h.kdk/System/Library/Extensions \
  --repository /System/Library/Extensions \
  --repository /System/Library/DriverExtensions \
  --explicit-only $(kmutil inspect -V release --no-header | grep -v "SEPHiber" | awk '{print " -b "$1; }')
This will create a VirtualMachine.kc file in your home directory. Keep in mind the path, as we’ll need to access this from recoveryOS.
Configuring our Mac to boot the Development Kernel Collection
Finally shutdown your Mac, and boot into recovery by holding the power button and selecting “Option”:
Next, authorize the user, and select Utilities -> Terminal from the Menubar. Here we’ll set some policies for our machine:
- Disable System Integrity Protection
- Allow custom boot args to be passed
- Configure our Mac to boot our custom Kernel Collection (adjust
Macintosh HDto your volume) - Set our boot-args
kcsuffix=: Set Kernel Collection variant to boothypervisor=: Enable special features in the Virtualization Stack (namely VM quota override)hv_apple_isa_vm_quota=: Override VM quota, the max value is0x7FFFFFFF(set to0xFF(255) VMs for practicality)
csrutil disable
bputil --disable-boot-args-restriction
kmutil configure-boot --volume /Volumes/Macintosh\ HD --custom-boot-object /Volumes/Macintosh\ HD/Users/*/VirtualMachine.kc
nvram 40A0DDD2-77F8-4392-B4A3-1E7304206516:boot-args='kcsuffix=development hypervisor=0x1 hv_apple_isa_vm_quota=0xFF'
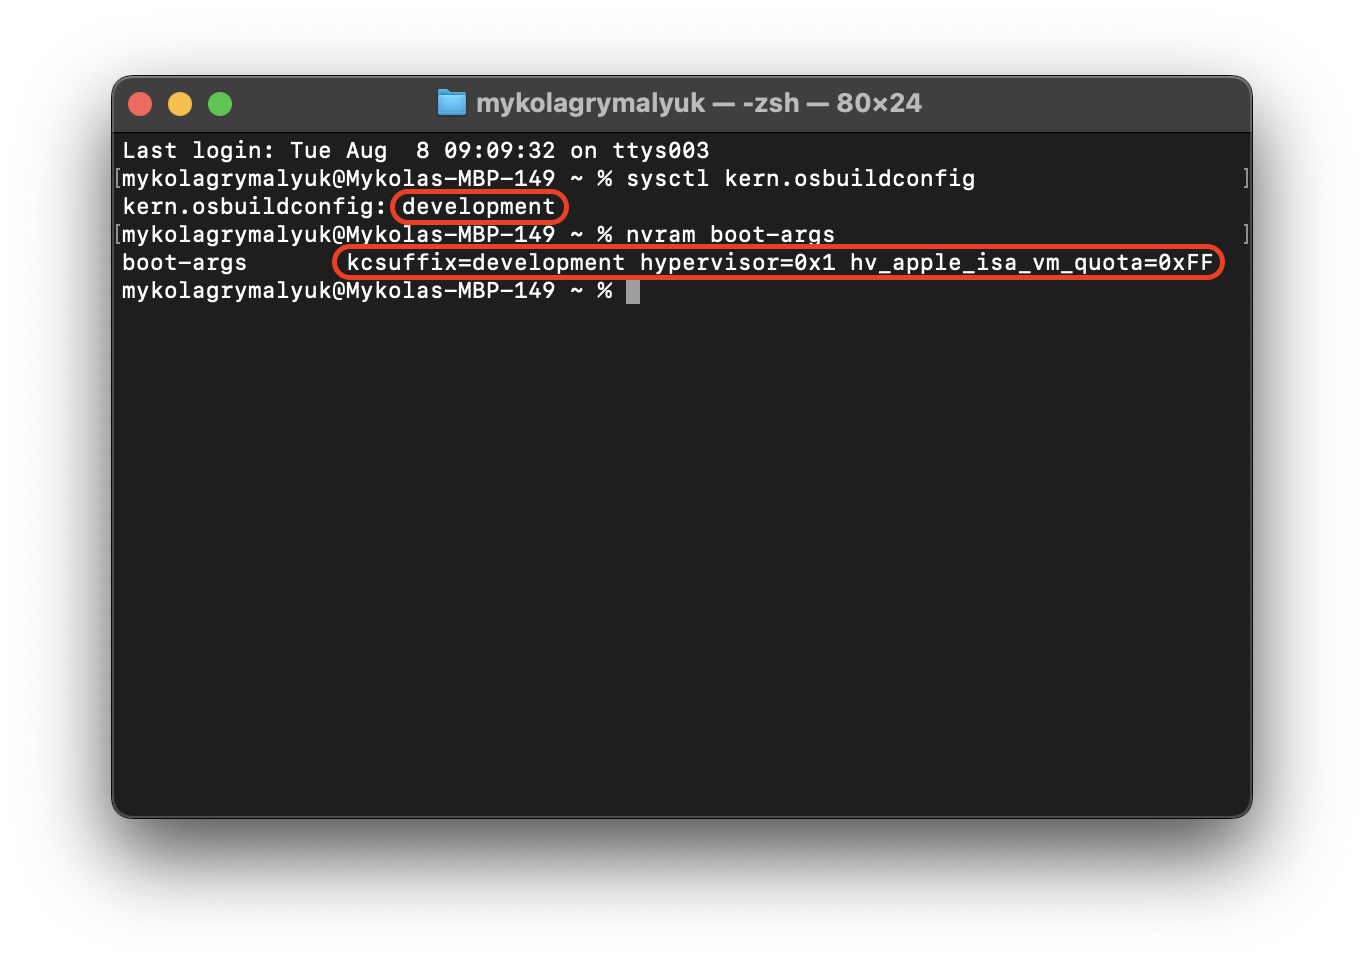
Once rebooted, you can verify this applied in Terminal:
sysctl kern.osbuildconfig
nvram boot-args
Putting our machine to work!
Now that everything is prepared, you’ll now want to grab any virtualization solution utilizing Virtualization.framework. Some examples include:
Now we can fire up our VMs! Below I got 9 macOS VMs running at once on my M2 Pro MacBook Pro, and still usable for testing!
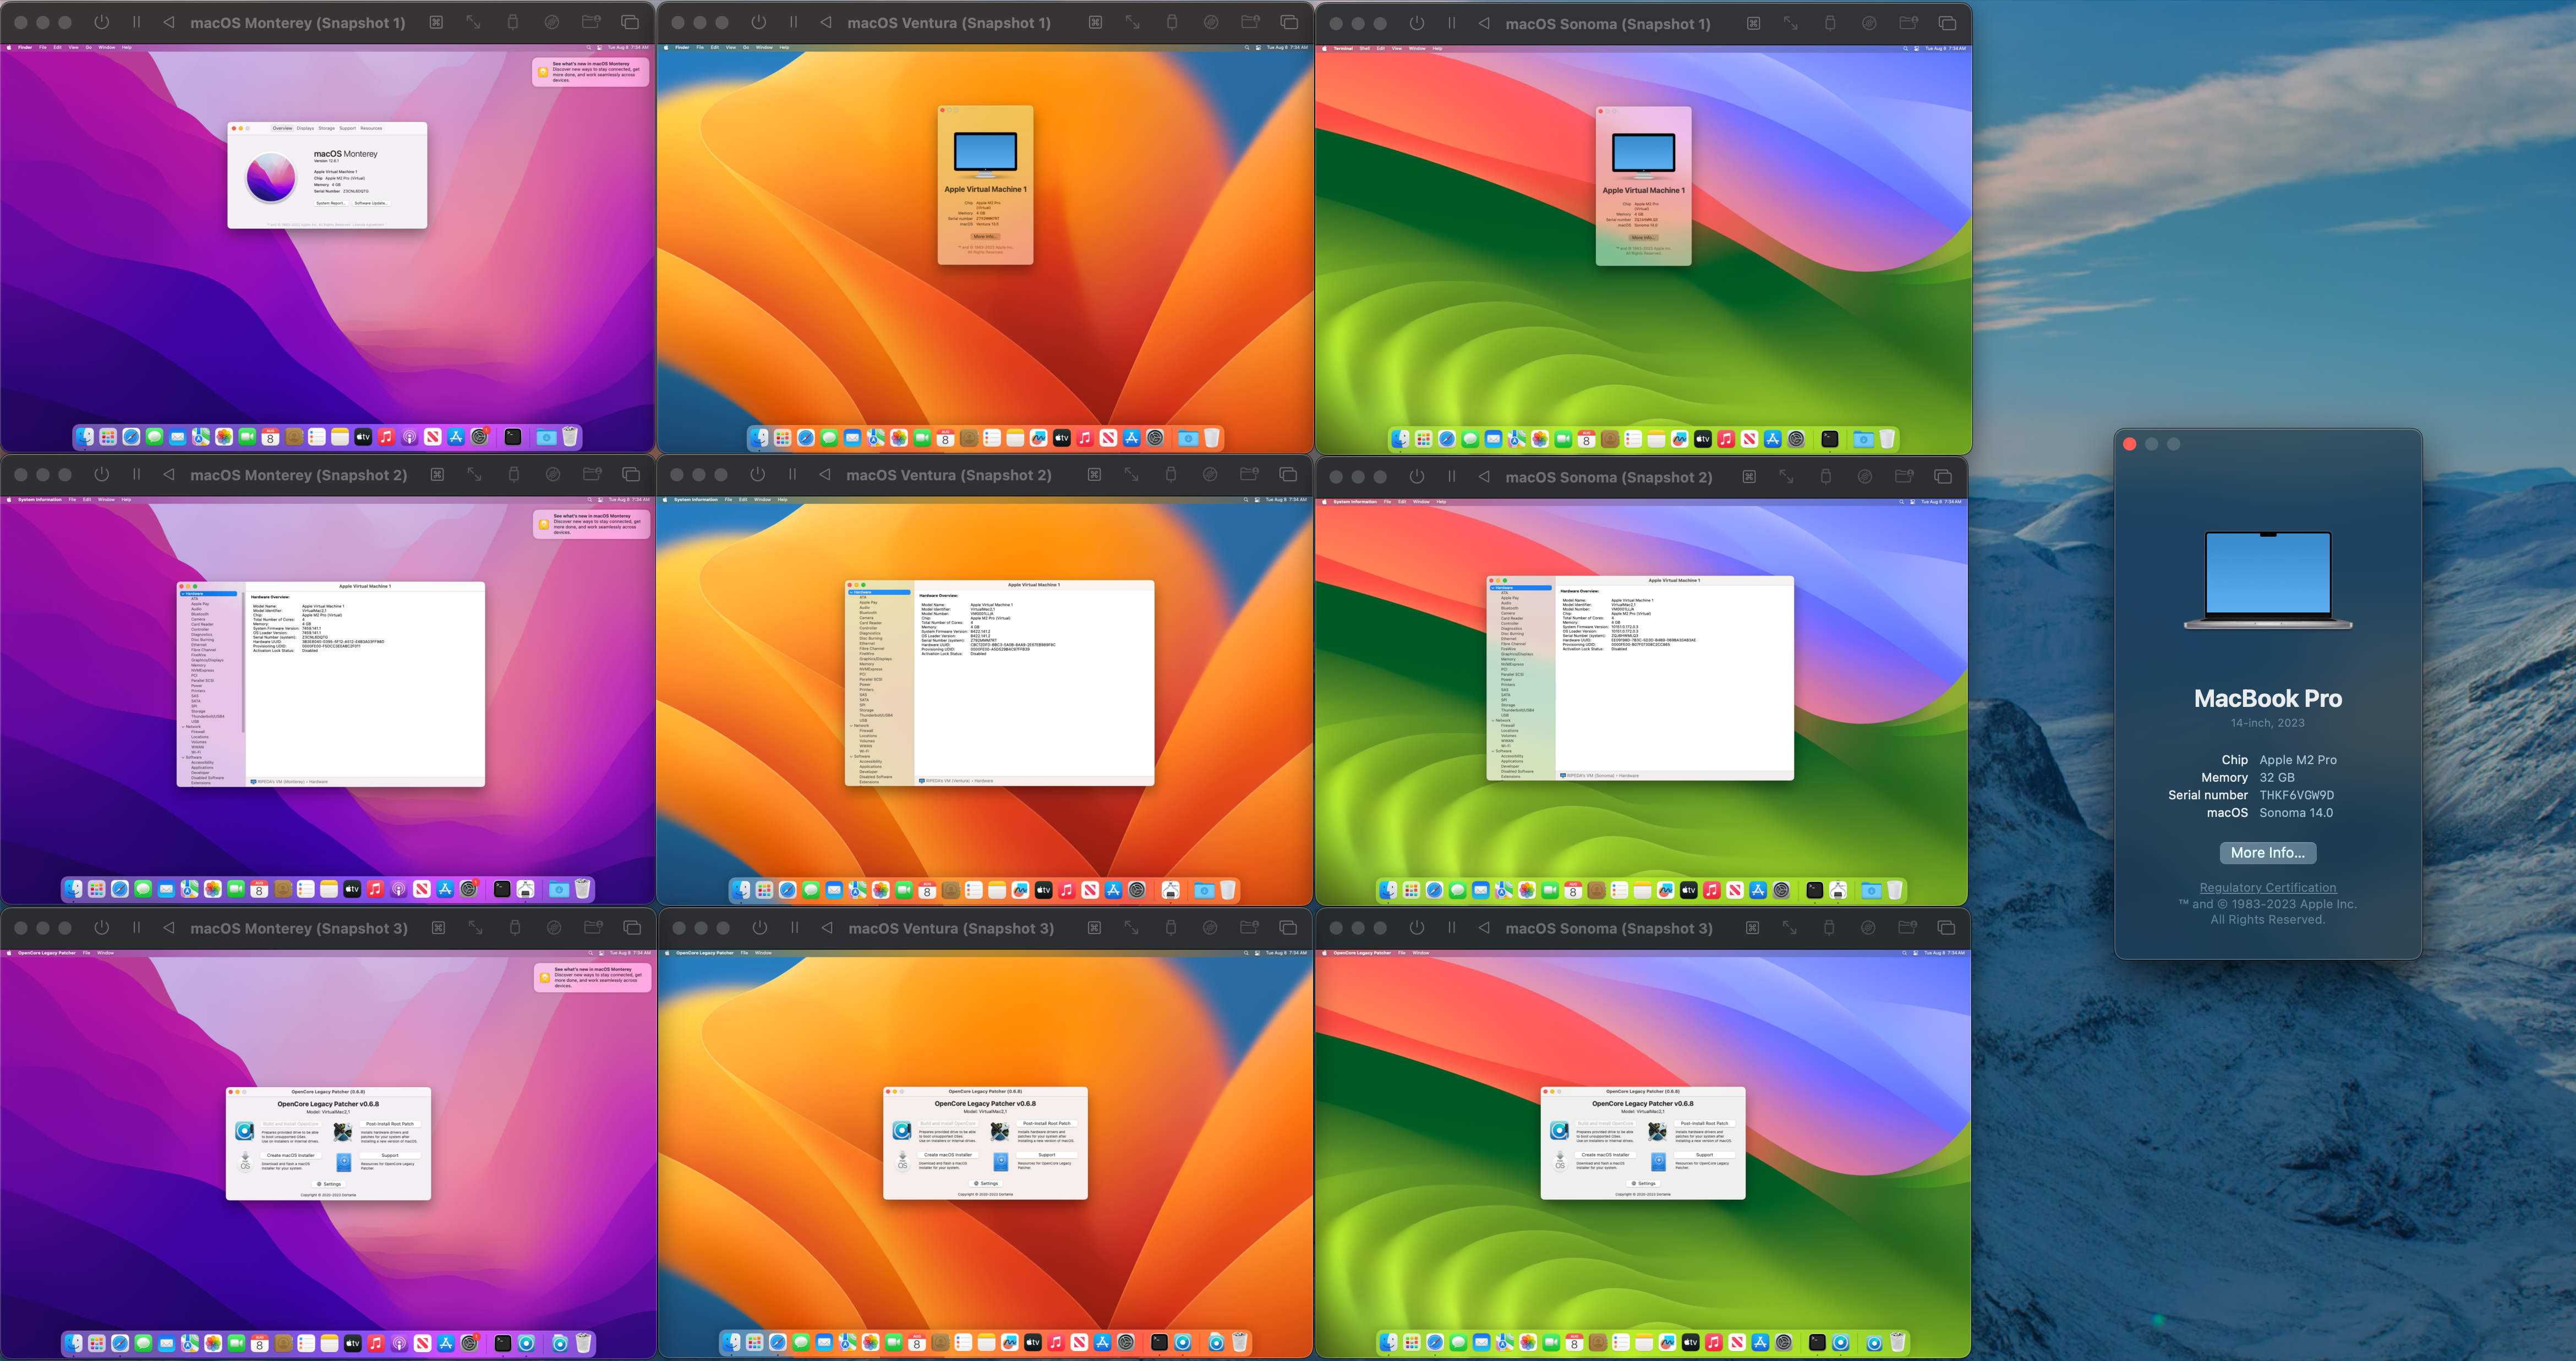
(This was also the first time I ever heard the fan turn on this machine, so we know we’re getting our money’s worth ;p)
When did Apple grace us with this feature?
It seems that with macOS 12, Monterey, Apple added this boot-arg along side the Virtualization stack. And as we saw with Sonoma’s kernel, the AppleInternal check is still present even in Monterey. It seems Apple still has a ton of secrets hiding within XNU.
Undoing our work for OS updates
When using a custom kernel collection with Apple Silicon, there are some unfortunate downsides. The biggest being that streamlined OS updates are no longer available. You can still install updates, however upon finishing the update your machine will error.
To fix this, you’ll need to revert to the stock kernel collection on your machine.
To reset, you simply need to create a new Boot Policy with bputil in recoveryOS. This can either be with full security (--full-security) or any other combination (ex. --disable-boot-args-restriction). Once you run this in recoveryOS and reboot, the stock kernel should be in effect.
Closing Thoughts
Overall this was a really interesting research journey and I’m glad I was able to figure out how Apple implemented this limitation. Additionally I really appreciate that even though this is an unsupported use case, the Virtualization team in CoreOS still provided the option for enthusiasts to override this limitation (even if not documented or straightforward to do so).
Some improvements I have in mind for the future (though unlikely to implement):
- Develop tooling to automate the KC building and booting.
- Download and generate a development kernel collection for a given host.
- Configure host in recoveryOS to boot the kernel collection.
- Look into developing a kernel extension that can override the
hv_apple_isa_vm_quotavariable.- Removes the need for a custom, development kernel collection.
Otherwise I hope the community finds this blog post interesting, my next journey will likely be seeing whether DEP Enrolment/Serial Number overrides for Apple Silicon VMs is possible. Though may not be as lucky as this post ;p